🎭 Face Performance with MetaHuman Animator
The last lesson handed your character the shared MetaHuman rig, and it closed with a promise: the face performance that rig now makes possible. This is that lesson. MetaHuman Animator is the tool that watches a real person act, an iPhone on a tripod, a helmet camera on set, or a plain video, and turns that performance into animation on the shared facial rig. You do not sculpt an expression key by key. You record a human doing it, and MetaHuman Animator does the translating. This lesson walks that capture end to end.
🧬 Advanced Track · Digital Humans
This is the third lesson of the Digital Humans with MetaHuman track. Lesson 1 mapped the shared-rig system and Lesson 2 put your own character onto that rig. Now you make the rig act. Read this as the payoff of the first two lessons: the reason a shared facial rig is worth so much is that a single captured performance can drive it, and any MetaHuman can receive that performance.
🎯 Learning Objectives
By the end of this lesson, you will be able to:
- Explain why capturing a face performance beats hand-keyframing one on the shared rig
- Describe how MetaHuman Animator solves a performance onto the shared facial control rig
- Compare what you can capture from: an iPhone, a head-mounted camera, and a plain video
- Walk the workflow: capture, ingest footage, build an actor identity, process, and apply the performance
- Locate where the performance lands, and how the Face track combines with separate body animation
- Drop a captured face performance into the Sequencer shot you already know how to build
Estimated Time: 50-65 minutes
Prerequisites: Mesh to MetaHuman (this lesson assumes a rigged MetaHuman to drive), plus Sequencer for how animation tracks sit on a shot and Retargeting for how body motion is handled separately. A working Unreal Engine 5.8 install with the MetaHuman plugin enabled.
In This Lesson
Why Capture a Face Instead of Keyframing One
A human face is the hardest thing in animation to fake. We spend our whole lives reading faces, so we notice the smallest wrongness: a smile that reaches the mouth but not the eyes, a blink half a beat late, lips that do not quite land on the word. Hand-animating a believable face means posing dozens of controls across every frame and still fighting that instinct in your audience. It is slow, it is specialist work, and it is the classic road into the uncanny valley.
The shared MetaHuman rig changes the economics of that problem, but only if you can feed it a real performance. A rig with hundreds of coordinated controls is a burden if you drive it by hand and a gift if you drive it from life. That is the whole premise of MetaHuman Animator: instead of building the expression, you record a person making it and let the tool solve the controls to match.
Figure: Why capture, not keyframe · hand-posing a face means fighting hundreds of controls and a viewer trained to spot every mistake. Capturing a real performance hands the timing and the micro-expressions to a person and lets the tool solve the rig to match.
The Idea: A Performance Onto the Shared Rig
Here is the key insight, and it is the same one that made the last two lessons worth it. Every MetaHuman shares the same facial control rig. MetaHuman Animator does not invent a rig for each actor; it watches a face and solves that one shared set of controls to reproduce the expression. The output is not a video pasted onto a head. It is animation data on the shared rig: the same curves and controls any MetaHuman understands.
Because the target is that shared rig, a captured performance is portable. Solve a performance once and it can drive any MetaHuman, including the one you built from your own mesh in Lesson 2. The actor in front of the camera and the character on screen do not have to be the same person, or even look alike. The tool captures the performance; the rig wears it.
Below is the face this course would drive. It is SK_Anya, framed by a Cine Camera from the intermediate track: a neutral, front-on human face, the exact target a captured performance would animate once she is a MetaHuman. A recorded smile, a spoken line, or a raised brow would move this face through the shared controls.
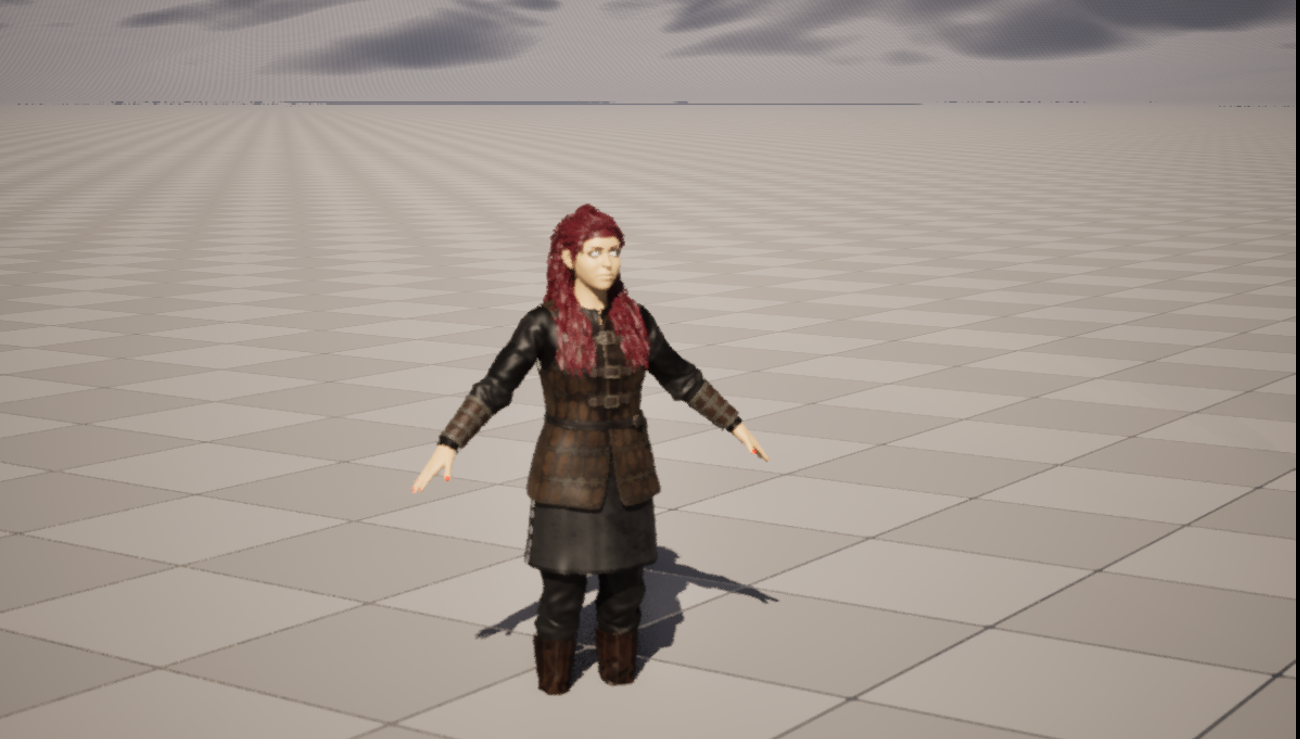
Figure: The face a performance would drive, captured live in the ClaudeTest project · SK_Anya framed by a Cine Camera, front-on and neutral. Once she is a MetaHuman, a captured performance moves this face through the shared control rig; the actor and the character never have to match.
💡 A performance is data, not a video
flowchart LR
    ACTOR[A real actor performs
on camera] -->|MetaHuman Animator solves it| ANIM[Animation on the
shared facial rig]
    ANIM --> MH1[Drives this MetaHuman]
    ANIM --> MH2[Or that MetaHuman]
    ANIM --> MH3[Or your own converted character]
    style ACTOR fill:#f3eefb,stroke:#7e57c2
    style ANIM fill:#e8eaf6,stroke:#3949ab
The capture becomes animation on the shared rig, so one solved performance is portable to any MetaHuman, not locked to the actor who gave it.
What You Can Capture From
MetaHuman Animator is not one camera; it is a range, and the camera you choose sets the ceiling on fidelity and the floor on cost. All three paths end at the same place, animation on the shared rig, but they get there with different amounts of information about the face.
Figure: The three capture sources · an iPhone with a depth sensor is the accessible high-quality starting point, a stereo head-mounted camera is the highest-fidelity production rig, and a plain mono video is the most flexible but lowest-fidelity source. All three solve onto the same shared facial rig.
One step is common to all of them and easy to skip past: the tool needs to understand the actor's neutral face first. Just as Mesh to MetaHuman solved an identity for your character, MetaHuman Animator establishes an identity for the performer, a calibrated read of their neutral face, so it can tell a genuine expression apart from the shape of that particular face at rest. Give it a clean neutral frame of the actor and the whole performance solves more truthfully.
The Workflow, Step by Step
The path from a recording to a moving MetaHuman has a fixed order, and each step feeds the next. Here is the whole road before you drive it.
💡 The MetaHuman Animator pipeline
flowchart TD
    CAP[Capture the performance
iPhone, helmet cam, or video] --> INGEST[Ingest the footage
bring it into the project]
    INGEST --> IDENT[Build the actor identity
from a neutral frame]
    IDENT --> PROC[Process the performance
solve the face frame by frame]
    PROC --> REVIEW[Review the solve
check timing, eyes, and lips]
    REVIEW --> APPLY[Apply to the MetaHuman
a Face animation asset]
    style CAP fill:#f3eefb,stroke:#7e57c2
    style PROC fill:#fff3cd,stroke:#ffc107
    style APPLY fill:#e8eaf6,stroke:#3949ab
Record the performance, ingest it, establish the actor's identity, process it into rig animation, review the result, then apply it to your MetaHuman as a Face animation.
Three of those steps decide the quality of your result, so they are worth a note:
- Build the actor identity. A clean neutral frame of the performer is the baseline the solve measures every expression against. Skimp here and the tool cannot separate the actor's resting face from the performance, and everything downstream drifts.
- Process, then review. Processing solves the face across every frame. Reviewing is where you catch the things a viewer would: a blink that did not register, eye direction that reads slightly off, lips that do not close on a plosive. Fix these before you commit the performance, not after.
- Apply to the MetaHuman. The solved performance becomes a Face animation asset. That is the moment the abstract solve turns into something you can drop on a character and play back on the shared rig.
✅ Pro Tip: light the face flat and even
The solve reads shape from what the camera sees, so hard shadows and hot highlights lie to it. Even, diffuse light on the performer's face gives the cleanest capture. Save the dramatic three-point lighting for the MetaHuman in the shot, not for the actor at capture time.
Where the Performance Lands
It is worth being precise about what you get and where it goes, because a MetaHuman is animated in two separate halves. The captured performance is a Face animation: the eyes, brows, lids, cheeks, lips, jaw, and tongue, all the controls of the shared facial rig. It does not include the body. The body is animated on its own, by retargeting or a Control Rig, exactly as you learned in the intermediate track.
Figure: Face and body are separate tracks · the captured performance drives the Face rig only; the body is animated on its own by retargeting or a Control Rig. Both play on the same MetaHuman, so you can refine each without disturbing the other.
Keeping the two apart is a feature, not a limitation. You can capture a face performance once and try it over different body animations, or fix a body without touching a solved face. And because the Face animation is just an asset, you can layer small manual adjustments on top of it: nudge a blink, ease a brow, dial an expression back a touch. The capture gives you a strong, human starting point; the controls are still yours to refine.
Into the Cinematic Shot
A solved face performance is not the finish line; it is a track you place. Everything you built in the intermediate track is where it goes. In Sequencer, your MetaHuman gets a Face animation track carrying the capture and a Body track carrying its motion, sitting alongside the Cine Camera and lights that frame and light the shot. Then Movie Render Queue renders it, the same as any other shot.
💡 A face performance joins the pipeline
flowchart LR
    PERF[Solved face performance] --> SEQ[Sequencer
Face track on the MetaHuman]
    BODY[Body animation] --> SEQ
    CAM[Cine Camera and lights] --> SEQ
    SEQ --> MRQ[Movie Render Queue]
    MRQ --> OUT[The finished shot]
    style PERF fill:#e8eaf6,stroke:#3949ab
    style SEQ fill:#e3f2fd,stroke:#2196F3
    style OUT fill:#e8f5e9,stroke:#4CAF50
The captured face becomes one track among the body animation, camera, and lights in Sequencer, then renders through the same Movie Render Queue you already know.
That is the shape of the whole advanced track coming together. Lesson 1 gave you the rig, Lesson 2 put your character on it, and this lesson made it act. What is still missing is the body side of a digital human done to the same standard, the mocap, the grooms, and the retargeting that finish the figure. That is the next lesson, and after it, a MetaHuman standing in a complete cinematic shot as the capstone of everything you have built.
Hands-On: Capture a Performance
Run one capture from end to end. The goal is not a perfect take, it is to feel the workflow and see how much a clean neutral frame and an even light change the result.
🎭 Exercise: from a recording to a moving face
- Record a short performance. With an iPhone that has a depth camera, capture ten to fifteen seconds of yourself saying a line, with even light on your face and a clear neutral moment at the start.
- Ingest the footage. Bring the recording into your project as capture footage so MetaHuman Animator can read both the video and its depth.
- Build your identity. Use the neutral frame to establish your actor identity, the calibrated read of your resting face.
- Process the performance. Solve the face across the clip, then play it back on a preview MetaHuman.
- Review honestly. Watch the eyes and lips. Did every blink register? Do the lips close on the plosive sounds? Note what reads wrong before you commit.
- Apply it. Turn the solve into a Face animation and apply it to your MetaHuman, ideally the one you built in Lesson 2, so you see your own character speak your line.
💡 Hint: the face reads wrong or dead?
Almost always it is the capture, not the character. If the whole face feels off, the neutral frame you gave the identity step was probably not neutral, so recapture with a genuine resting face. If detail is mushy, check your light: hard shadows and blown highlights starve the solve of the shape it needs, so relight flatter and more even and try again. The fix lives at capture time far more often than in the applied animation.
✅ Reach exercise: one performance, two characters
Take the Face animation you just solved and apply it to a second MetaHuman that looks nothing like you. Watching the same performance drive a different face is the clearest possible demonstration of this lesson's core idea: the capture is portable data on a shared rig, not a recording locked to one person.
Knowledge Check
Question 1
Why is capturing a face performance preferable to hand-keyframing one on the shared rig?
Correct answer: B · The face is the hardest thing to fake because we read faces expertly. Hand-posing dozens of controls per frame is slow and prone to the uncanny valley, while capturing a real performance hands the timing and life to a person and lets MetaHuman Animator solve the controls.
Question 2
What does MetaHuman Animator actually produce from a capture?
Correct answer: B · The output is animation on the same shared controls every MetaHuman has, not a video. Because it targets the shared rig, one solved performance can drive any MetaHuman, including a character you converted from your own mesh.
Question 3
Which capture source is the highest-fidelity, production-grade option?
Correct answer: B · A stereo head-mounted camera gives two calibrated views of the face, hands free, and is what a film shoot uses. An iPhone with depth is the accessible high-quality starting point, and a plain video is the most flexible but lowest-fidelity source.
Question 4
Why does the workflow build an identity for the actor before solving the performance?
Correct answer: B · The identity is the baseline the solve measures every expression against. Without a clean neutral read of the performer, the tool cannot separate the resting face from the performance, and everything downstream drifts.
Question 5
How does a captured face performance relate to the character's body animation?
Correct answer: B · A MetaHuman is animated in two halves. The Face track comes from MetaHuman Animator; the Body track comes from retargeting or a Control Rig. Keeping them apart lets you refine one without disturbing the other, and both layer on the same character.
Summary
You captured a face performance and drove it onto the shared MetaHuman rig. Here is what to carry forward:
Capture beats keyframing for faces. A believable human face is the hardest thing to fake and the easiest for a viewer to catch. Rather than posing hundreds of controls by hand, MetaHuman Animator records a real performance and solves the controls to match, giving you honest timing and micro-expressions the shared rig can carry.
The output is portable data. A solved performance is animation on the shared facial rig, not a video, so it can drive any MetaHuman. The actor and the character never have to match. Choose your capture source, an iPhone with depth, a stereo helmet camera, or a plain video, by the fidelity you need, and always give the tool a clean neutral frame of the performer.
Face and body stay separate, then join in the shot. The capture animates only the Face; the body is retargeted or Control-Rigged on its own. Both tracks layer on the same MetaHuman in Sequencer, alongside the camera and lights, and render through Movie Render Queue like any other shot.
🔑 Key Takeaways
- Capturing a real performance beats hand-keyframing a face, which is slow and prone to the uncanny valley
- MetaHuman Animator solves a performance into animation on the shared rig, so it is portable to any MetaHuman
- You can capture from an iPhone with depth, a stereo head-mounted camera, or a plain video, at rising fidelity and cost
- A clean neutral frame builds the actor identity that keeps the whole solve truthful
- The Face track and the Body track are animated separately, then layered on the same character in Sequencer
👆 A note on this lesson's figures
The face image is a genuine live capture from the ClaudeTest project: SK_Anya framed by a Cine Camera, standing in for the human face a performance would drive. The keyframe-versus-capture, capture-sources, two-track, and pipeline diagrams are labeled illustrations, because this project contains no MetaHuman asset and MetaHuman Animator itself is a camera-and-cloud capture workflow, so there is no live performance the automation bridge used for the course's captures can drive. The steps and relationships they show are exactly the ones you follow in the tool.
Where this fits
This lesson is where a MetaHuman stops being a still figure and starts to act. The performance it produces travels the same Story-to-Screen pipeline as any animation: character finalization, animation, shot assembly, cinematography, and output. What changes is that the performance driving the face was captured from a real person and solved onto a rig your character shares with every other MetaHuman.