👤 What Is a MetaHuman?
The hardest thing to build in real time is a person. You have spent your whole life reading faces, so anything slightly wrong reads as wrong. A MetaHuman is Epic's answer: a preset, fully rigged, real-time digital human that would take a specialist team months to build, handed to you in an afternoon. This lesson opens the Advanced track by answering what a MetaHuman actually is, what it is made of, where it comes from, and where it drops into the cinematic pipeline you built in the intermediate track. It is the map for everything the advanced lessons go deep on.
🧬 Advanced Track · Digital Humans
This is the first lesson of the Digital Humans with MetaHuman track, a new theme that builds on top of the Cinematic Production track. It assumes you are comfortable with characters, animation, and shots. Where the intermediate track taught you to move and film a character, this track is about the character itself: a production-grade digital human, its face performance, and how it plugs into the shots you already know how to build. Start here for the overview, then go deep in the lessons ahead.
🎯 Learning Objectives
By the end of this lesson, you will be able to:
- Explain why a believable digital human is hard, and the five problems MetaHuman solves at once
- Describe what a MetaHuman is: a shared-topology, shared-rig system rather than a single mesh
- Name the parts of a MetaHuman: the face and its rig, the body, grooms, levels of detail, and layered skin
- Tell the two ways a MetaHuman is created: MetaHuman Creator and Mesh to MetaHuman
- Decide when a MetaHuman is the right choice and when a custom character is, and how the two meet
- Place a MetaHuman in the cinematic pipeline you already know, and see what its face performance adds
Estimated Time: 45-60 minutes
Prerequisites: The Cinematic Production track, especially Characters & Animation (Skeletal Mesh and Skeleton) and Retargeting with the IK Retargeter. A working Unreal Engine 5.8 install so you can follow the hands-on.
In This Lesson
The Problem MetaHuman Solves
Everything else in a scene gets the benefit of the doubt. A slightly wrong rock is still a rock. A slightly wrong human, though, is unsettling, and the closer it gets to real without arriving, the worse it feels. That gap has a name, the uncanny valley, and it is why a convincing digital person is the single most expensive thing to make in real time.
The cost is not one big problem, it is five hard problems stacked on top of each other, and each one is a specialist craft on its own:
Figure: The five problems a believable human poses · clean topology, a facial rig, levels of detail, grooms, and skin shading. Solving all five by hand is months of specialist work; MetaHuman is Epic having solved them once, at high quality, so you reuse the result.
MetaHuman's premise is simple once you see the list: solve those five problems one time, to a film-grade standard, and let every creator reuse that solution for any human they need. You stop building humans and start casting them.
What a MetaHuman Actually Is
The most common misunderstanding is that a MetaHuman is a character model, like a fancier version of the mesh you imported in Lesson 1. It is not. A MetaHuman is a preset, fully rigged human assembled from a shared system. Every MetaHuman is built on the same face topology and driven by the same facial rig, with a body chosen from a set of calibrated body types.
That shared foundation is the whole trick, and it has one enormous consequence: anything you build for one MetaHuman transfers to every other MetaHuman. A facial animation, an expression pose, a material adjustment, all of it moves from face to face, because underneath, the faces are the same mesh with the same controls. Individuality lives in the DNA, a small description of one person's geometry, while the rig, the levels of detail, and the shading are common infrastructure shared by all of them.
Figure: Three different MetaHuman faces sit on top of one shared topology and facial rig · the differences between people live in each one's DNA, while the rig is common, so a facial performance authored on one plays back correctly on any of them.
Anatomy of a MetaHuman
When you bring a MetaHuman into a project you do not get one asset, you get an assembly. Knowing its parts tells you where to look when you want to change something, and it explains why a MetaHuman is heavier than the plain Skeletal Mesh you met in the intro course.
💡 The parts of a MetaHuman
flowchart TD
    MH[A MetaHuman] --> FACE[Face]
    MH --> BODY[Body]
    MH --> LOD[Levels of detail
LOD0 film to LOD7 crowd]
    MH --> MAT[Layered materials
skin, eyes, teeth]
    FACE --> FMESH[Face skeletal mesh]
    FACE --> RIG[Facial rig
driven by the DNA]
    FACE --> GROOM[Grooms
hair, brows, lashes, beard]
    BODY --> BTYPE[A preset body type]
    BODY --> BMESH[Body skeletal mesh + skeleton]
    style MH fill:#e8eaf6,stroke:#3949ab
    style FACE fill:#e3f2fd,stroke:#2196F3
    style BODY fill:#ede7f6,stroke:#7e57c2
    style RIG fill:#fff3cd,stroke:#ffc107
A face and its rig, a body from a preset type, strand-based grooms, eight levels of detail, and layered skin materials, all bundled as one character.
A few of these deserve a sentence each, because they are the parts you will hear about constantly:
- The facial rig and its DNA. The face is driven by hundreds of controls, and the specific shape of one person's face is stored in a small DNA asset. Swap the DNA and you have a different person on the same rig. This is what the shared-rig idea looks like in a file.
- Grooms. MetaHuman hair, brows, lashes, and beards are strand-based grooms, thousands of actual hair curves, not a texture painted on a cap. That is a big part of why they read as real, and why they need levels of detail to stay real-time.
- Levels of detail. A MetaHuman ships with eight LODs, from LOD0 for a film close-up down to LOD7 for a distant face in a crowd. The engine swaps them by distance so a MetaHuman can be a hero in one shot and a background extra in the next without wrecking performance.
- Layered skin. The skin material is built in layers so light scatters through it the way it does in real skin, which is the difference between a person and a mannequin.
Where MetaHumans Come From
There are two doors into the MetaHuman system, and the advanced track has a lesson behind each. The first is the one most people picture; the second is the one that matters most for your own characters.
💡 Two paths to a MetaHuman
flowchart LR
    START1[Start from presets] --> MHC[MetaHuman Creator
sculpt, blend, style]
    START2[Start from a mesh you have
scan, sculpt, or existing character] --> M2MH[Mesh to MetaHuman
track features, solve identity]
    MHC --> MH[A finished, rigged MetaHuman]
    M2MH --> MH
    MH --> BRING[Into your project
via the MetaHuman plugin and Fab]
    style MHC fill:#e3f2fd,stroke:#2196F3
    style M2MH fill:#e8f5e9,stroke:#4CAF50
    style MH fill:#e8eaf6,stroke:#3949ab
Build a face from presets in MetaHuman Creator, or hand Unreal a mesh you already have and let Mesh to MetaHuman solve a rigged identity from it. Either way you download the result into your project through the MetaHuman plugin.
MetaHuman Creator is Epic's free tool for building a human from presets: you sculpt and blend facial features, pick a body type, choose skin and grooms, and it hands you a finished, fully rigged MetaHuman. It began life as a cloud app you used in a browser, and in recent Unreal versions it also runs inside the editor through the MetaHuman plugin. It is how you get a believable person when you do not have a specific face in mind, or want one fast.
Mesh to MetaHuman is the door that connects MetaHuman to the work you have already done. You start from a mesh you own, a 3D scan, a sculpt, or a character like the Daz figures at the heart of this course, and Unreal tracks its facial features and solves a MetaHuman identity that matches it, auto-rigging your mesh onto the shared MetaHuman face. Your one-off character inherits the entire MetaHuman rig without you building any of it. That workflow is important enough that it is the whole of Lesson 2.
✅ Why this matters for your pipeline
The course's running example, the Daz-derived character you met as SK_Anya in Lesson 1, is exactly the kind of bespoke human Mesh to MetaHuman was made for. It lets a character you designed borrow MetaHuman's rig, face performance, and levels of detail instead of building all of that by hand. This lesson is the map; the next one drives that road.
MetaHuman vs. a Custom Character
A MetaHuman is powerful, but it is not the answer to every character. The useful question is not "is MetaHuman good" but "is this the right shot for a MetaHuman," and the answer follows from what each approach is best at.
Figure: MetaHuman versus a custom character is a choice about the shot, not a contest · MetaHuman wins on speed, shared animation, and convincing faces; a bespoke mesh wins on a specific or non-human design. Mesh to MetaHuman and retargeting let the two meet in the middle.
They are not rivals, and the best pipelines use both. Mesh to MetaHuman lets a bespoke human borrow the MetaHuman rig, and retargeting, the workflow from the intermediate track, lets MetaHuman body animation drive a custom skeleton or the reverse. Here is the course's own bespoke human, the kind of character that sits on the right-hand side of that choice today and becomes a Mesh to MetaHuman input tomorrow:
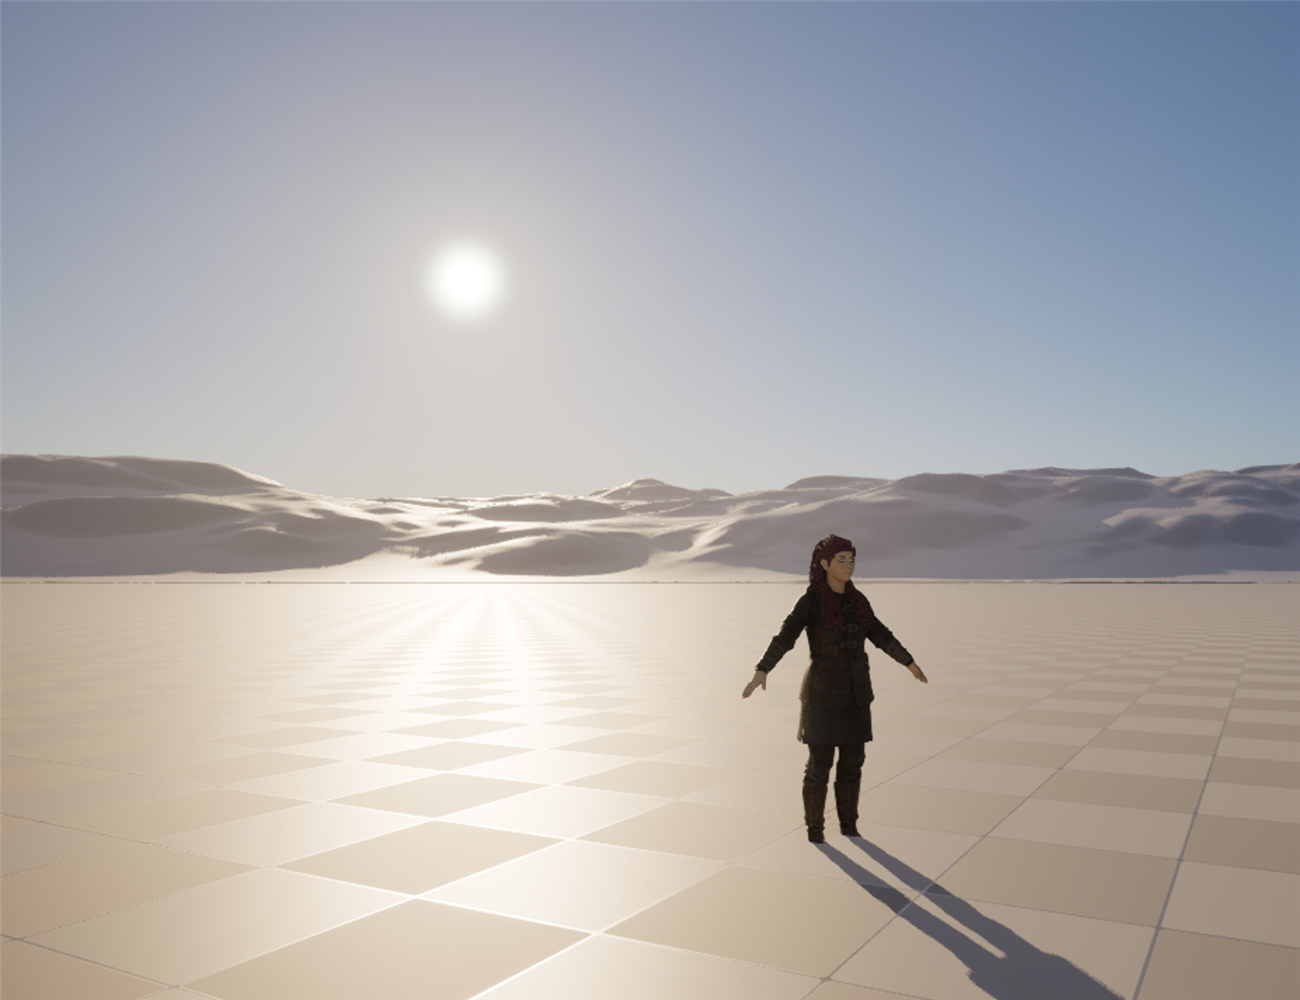
Figure: A bespoke digital human captured live in the ClaudeTest project · the course's Daz-derived SK_Anya. Today it is a custom character carrying its own rig; in the next lesson this same mesh becomes the input to Mesh to MetaHuman, borrowing the shared MetaHuman rig instead of building one by hand.
Where It Fits the Cinematic Pipeline
Here is the reassuring part. To the pipeline you built in the intermediate track, a MetaHuman is still just a rigged character. You stage it, give its body a performance by retargeting or Control Rig, assemble the shot in Sequencer, light it for the camera, and render through the Movie Render Queue. Nothing about that changes. Your capstone shot already knows how to film a MetaHuman.
What a MetaHuman adds is a production-grade face. Alongside the body performance you already know how to make, MetaHuman gives you a facial rig that a real performance can drive, so lip-sync and expression stop being weeks of hand-keying and become a capture you clean up.
💡 A MetaHuman in the shot you already build
flowchart LR
    MH[A MetaHuman] --> BODY[Body performance
retarget or Control Rig]
    MH --> FACE[Face performance
MetaHuman Animator]
    BODY --> SEQ[Assemble in Sequencer]
    FACE --> SEQ
    SEQ --> LIGHT[Light for the camera]
    LIGHT --> REND[Render via MRQ]
    REND --> SHOT[A finished shot]
    style MH fill:#e8eaf6,stroke:#3949ab
    style FACE fill:#e3f2fd,stroke:#2196F3
    style SHOT fill:#e8f5e9,stroke:#4CAF50
The body path is the intermediate track unchanged. The face path is what the advanced track adds: a captured facial performance driving the shared rig, feeding the same Sequencer, lighting, and render you already know.
That is the shape of the track ahead. This lesson is the overview; the lessons that follow open each door in turn, from turning your own mesh into a MetaHuman, to capturing a face performance, to putting a digital human into a finished cinematic shot.
Hands-On: Meet a MetaHuman
You learn a MetaHuman fastest by opening one and finding the parts this lesson named. You do not need to build anything yet; the goal is to see the assembly in a real asset before the next lesson makes one.
👤 Exercise: open a preset MetaHuman and find its parts
- Enable the plugin. In your Unreal 5.8 project, enable the MetaHuman plugin and restart the editor if prompted.
- Get a MetaHuman. Open Fab from inside the editor and download one of the free preset MetaHumans. It arrives as a folder of assets in your project.
- Drop it in a level. Drag the MetaHuman Blueprint into an empty level and look at it up close. This is the same "stage the character" step from Lesson 1.
- Open the face and body. Find the Face and Body skeletal meshes in the MetaHuman's folder and open each. Notice the face has its own skeleton and a large set of controls, and the body is a separate Skeletal Mesh on its own skeleton.
- Find the levels of detail. In the mesh editor, change the forced LOD from 0 upward and watch the geometry and grooms simplify. That is the eight-LOD system keeping a MetaHuman real-time.
- Preview a face animation. If a sample facial animation is available, scrub it on the face and watch the shared rig drive the expression.
💡 Hint: the MetaHuman looks flat or low-detail in the level?
Two usual causes. If the whole character looks simplified, the level is showing a higher LOD because of the camera distance or a forced-LOD setting, so move closer or force LOD0. If the skin looks plasticky, the project may be missing the ray-traced or high-quality shadow and lighting settings MetaHuman skin expects; a MetaHuman is only as convincing as the lighting you give it, which is the whole point of Lesson 5.
✅ Reach exercise: preview the bridge
If you have a character mesh of your own, open the Mesh to MetaHuman tool and start the process of tracking its face, just far enough to see it place landmarks on your mesh. Do not finish it yet. You are looking at the front door of the next lesson, where you will turn a bespoke human like the course's SK_Anya into a rigged MetaHuman.
Knowledge Check
Question 1
Why is a believable digital human uniquely expensive to build?
Correct answer: B · A convincing person is five specialist crafts in one, and because we read faces expertly, any single weak link drops the character into the uncanny valley. MetaHuman solves all five once so you can reuse the result.
Question 2
What is the key idea behind every MetaHuman sharing the same face topology and rig?
Correct answer: B · Because the mesh and controls are shared, a performance authored on one face plays back correctly on any MetaHuman. Individuality lives in each one's DNA; the rig is common infrastructure.
Question 3
A MetaHuman ships with eight levels of detail. What are they for?
Correct answer: B · LOD0 is the hero close-up; LOD7 is a face in a distant crowd. The engine swaps them by distance so one MetaHuman can be a hero in one shot and a background extra in the next without hurting performance.
Question 4
You have a character you already sculpted and want it to have a MetaHuman-quality rig. Which door do you use?
Correct answer: B · MetaHuman Creator builds a new human from presets. Mesh to MetaHuman starts from a mesh you already have and solves an identity onto it, giving your bespoke character the shared MetaHuman rig. That is the subject of the next lesson.
Question 5
Compared with the intermediate cinematic pipeline, what does a MetaHuman mainly add?
Correct answer: B · To the pipeline a MetaHuman is still a rigged character you stage, animate, assemble, light, and render as before. What it adds is a shared facial rig that a real face performance can drive, which the advanced track captures in a later lesson.
Summary
You now have the map of the advanced track. Here is what a MetaHuman is and why it matters:
A MetaHuman is a solved human, not a model. Building a believable person means solving five problems at once, topology, facial rig, levels of detail, grooms, and skin. MetaHuman is Epic having solved all five to a film-grade standard so you reuse the result instead of rebuilding it.
The system is shared, and that is the whole point. Every MetaHuman rides the same face topology and rig, with individuality stored in each one's DNA. Because the rig is common, a facial performance built once transfers to any MetaHuman. The character is an assembly: a face and its rig, a body from a preset type, strand grooms, eight LODs, and layered skin.
Two doors in, one place it fits. You get a MetaHuman from MetaHuman Creator or from Mesh to MetaHuman, and to your cinematic pipeline it is still a rigged character you stage, animate, assemble, light, and render. What it adds is a face performance the rest of the track will teach you to capture.
🔑 Key Takeaways
- A believable human is five hard problems at once; MetaHuman solves them once so you cast humans instead of building them
- A MetaHuman is a shared-topology, shared-rig system, so anything built for one MetaHuman transfers to all of them
- Its parts are a face plus its DNA-driven rig, a body from a preset type, strand grooms, eight levels of detail, and layered skin
- MetaHumans come from MetaHuman Creator or from Mesh to MetaHuman, and arrive through the MetaHuman plugin and Fab
- To the cinematic pipeline a MetaHuman is a rigged character; what it adds is a production-grade face performance
👆 A note on this lesson's figures
The character image is a genuine real-time viewport capture from the ClaudeTest project: the course's Daz-derived SK_Anya, shown as an example of a bespoke digital human rather than a MetaHuman. The diagrams of the five problems, the shared rig, the anatomy, the two creation paths, the choice between MetaHuman and a custom character, and the pipeline are labeled illustrations of the concepts, because this project contains no MetaHuman asset and MetaHuman Creator and Mesh to MetaHuman are cloud-and-editor tools that the automation bridge used for the course's live captures cannot drive. The concepts they show are exactly the ones the next lessons put into practice on a real MetaHuman.
Where this fits
This lesson opens the Unreal course's advanced tier and sits on top of everything before it. The character it introduces still travels the same Story-to-Screen pipeline: character finalization, animation, shot assembly, cinematography, and output. What the advanced track adds is a better human to send down it, and the lessons ahead build that human step by step.