✨ Special Material Types
Not every surface is a simple opaque solid. Glass windows let light through. Leaves have complex cutout shapes. Neon signs glow in the dark. Bullet holes appear on walls without adding geometry. Vast terrains blend multiple textures seamlessly. In this lesson, you'll master the specialized material techniques that bring these effects to life in Unreal Engine.
🎯 Learning Objectives
By the end of this lesson, you will be able to:
- Configure translucent materials for glass, water, and see-through effects
- Create masked materials for foliage, fences, and complex cutouts
- Build emissive materials that appear to glow and emit light
- Use decals to add detail like dirt, damage, and signage without extra geometry
- Understand the basics of landscape materials for terrain texturing
- Explore Substrate, Unreal's next-generation layered material system (Experimental in UE 5.8)
- Produce stylized and toon (non-photorealistic) looks with post-process materials
- Choose the right material type for different visual requirements
Estimated Time: 50-60 minutes
Prerequisites: Lesson 3.4 - Material Instances and Parameters
In This Lesson
Understanding Blend Modes
Before diving into specific material types, you need to understand Blend Modes—the fundamental setting that determines how a material interacts with whatever is behind it. This single property transforms how the entire material renders.
Find the Blend Mode in the Material Editor's Details panel under Material → Blend Mode. Let's explore each option:
Opaque (Default)
The standard mode for solid surfaces. Light doesn't pass through, and you can't see anything behind the object. This is the most performant option because the renderer doesn't need to composite multiple layers.
Use for: Walls, floors, rocks, metal, wood—any solid surface
Masked
Pixels are either fully visible or fully invisible based on an opacity mask. There's no partial transparency—each pixel is a hard yes or no. This enables complex shapes from simple geometry (a flat plane can display a detailed leaf).
Use for: Foliage, chain-link fences, grates, hair cards, decals with hard edges
Translucent
Allows partial transparency—pixels can be anywhere from 0% to 100% visible. This enables glass, liquids, smoke, and other see-through materials. However, it's more expensive to render than Opaque or Masked.
Use for: Glass, water, ice, smoke, holograms, UI elements in world space
Additive
Adds the material's color to whatever is behind it, making everything brighter. Black becomes invisible (adds nothing), while bright colors create intense glows. Cannot darken the scene.
Use for: Fire, magic effects, lens flares, energy beams, ghosts
Modulate
Multiplies the material's color with the background. White has no effect, black makes the background completely dark, and colors tint the background. Rarely used but useful for specific effects like shadows on transparent surfaces.
Use for: Projected shadows, colored glass shadows, special tinting effects
Figure: Each blend mode has distinct visual behavior and performance characteristics.
⚠️ Watch Out: Translucent Sorting Issues
Translucent materials can have sorting problems when multiple transparent objects overlap. The renderer may draw them in the wrong order, causing visual artifacts. For simple cases, adjust the Translucency Sort Priority in the material settings. For complex scenes, consider if Masked could work instead.
Translucent Materials
Translucent materials let you see through surfaces with varying degrees of transparency. They're essential for glass, water, ice, holograms, and any effect where background visibility matters.
Setting Up Basic Translucency
Step 1: Create a new material and open it in the Material Editor.
Step 2: In the Details panel, find Material → Blend Mode and change it from Opaque to Translucent.
Step 3: Notice that the Opacity input on the main material node is now active. This controls how see-through the surface is: 0 = fully transparent, 1 = fully opaque.
Step 4: Connect a value to Opacity. For simple glass, try a Constant with value 0.3 (mostly transparent).
Figure: A basic translucent glass material with tint, opacity, and low roughness.
Translucent Lighting Modes
Translucent materials have special lighting options found in Details → Translucency → Lighting Mode:
Volumetric NonDirectional: Cheapest option. Light affects the whole surface uniformly—no sense of direction. Good for particles and simple effects.
Volumetric Directional: Adds basic directional lighting response. The surface reacts to light direction but without full detail.
Volumetric PerVertex NonDirectional/Directional: Calculates lighting per vertex instead of per pixel. Faster but less accurate on detailed meshes.
Surface ForwardShading: Highest quality. Enables full PBR lighting including reflections and specular. Most expensive but looks best for glass and water.
✅ Pro Tip: Glass That Looks Real
For convincing glass, use Surface ForwardShading lighting mode, very low roughness (0.0-0.1), and enable Screen Space Reflections in the translucency settings. Add a subtle Fresnel effect to make edges more reflective than the center—real glass does this naturally.
Fresnel Effect for Realistic Glass
The Fresnel effect makes surfaces more reflective at glancing angles. Look at a window from straight on—you see through it clearly. Look at it from a sharp angle—it becomes mirror-like. This is Fresnel in action.
Add a Fresnel node to your material. Connect it to Opacity (inverted) so edges become more opaque, or use it to blend between reflection and transparency.
Figure: Fresnel makes glass more reflective at shallow viewing angles, mimicking real-world physics.
Refraction
Real glass bends light passing through it—this is refraction. Enable it in Details → Translucency → Refraction Mode (set to "Index of Refraction" or "Pixel Normal Offset").
The Refraction input on the material node controls the Index of Refraction (IOR). Common values:
- Air: 1.0 (no refraction)
- Water: 1.33
- Glass: 1.5
- Diamond: 2.4
⚠️ Watch Out: Refraction Performance
Refraction requires rendering the scene behind the object to a separate buffer, which is expensive. Use it sparingly—a few glass windows are fine, but hundreds of refractive particles will tank performance. For distant or small glass objects, skip refraction entirely.
Two-Sided Translucency
By default, materials only render on one side of a mesh (the side with outward-facing normals). For thin translucent objects like glass panes or bubbles, you often need both sides visible.
Enable Two Sided in the material's Details panel. For translucent materials, also consider enabling Two Sided Foliage if you want light to transmit through (useful for leaves and thin cloth).
Masked Materials
Masked materials create complex shapes from simple geometry using alpha textures. Unlike translucent materials, masked pixels are either fully visible or fully invisible—there's no partial transparency. This makes them more performant while still enabling detailed silhouettes.
📖 Definition
Opacity Mask: A grayscale texture (or computed value) that determines which pixels are visible. White pixels are visible, black pixels are discarded. The Opacity Mask Clip Value sets the threshold—pixels below this value disappear.
Setting Up a Masked Material
Step 1: Create a new material. In Details, set Blend Mode to Masked.
Step 2: The Opacity Mask input becomes active on the material node. Connect a mask texture or value here.
Step 3: Adjust Opacity Mask Clip Value in the Details panel. Default is 0.333. Lower values show more of the mask; higher values cut away more.
Figure: Masked materials combine color textures with alpha masks to create complex shapes from simple geometry.
Common Masked Material Uses
Foliage: Leaves, grass, and plants use masked materials extensively. A simple card (two triangles) can display a detailed leaf shape.
Fences and Grates: Chain-link fences, ventilation grates, and railings use masks to show the gaps between solid parts.
Hair Cards: Character hair often uses textured planes with masked materials for individual strand detail without millions of polygons.
Decals: Many decals use masked materials for hard-edged shapes like logos, signs, and symbols.
The Clip Value Explained
The Opacity Mask Clip Value determines the threshold between visible and invisible. If your mask texture has a pixel with value 0.5:
- Clip Value 0.3 → 0.5 > 0.3 → Pixel is visible
- Clip Value 0.6 → 0.5 < 0.6 → Pixel is invisible
Adjusting the clip value lets you fine-tune the mask edge without changing the texture. Lower values reveal more; higher values cut more away.
flowchart LR
    subgraph Input["Mask Pixel Value"]
        P["Pixel: 0.5"]
    end

    subgraph Compare["Compare to Clip Value"]
        C1["Clip: 0.33\n0.5 > 0.33"]
        C2["Clip: 0.5\n0.5 = 0.5"]
        C3["Clip: 0.75\n0.5 < 0.75"]
    end

    subgraph Result["Result"]
        R1["✓ VISIBLE"]
        R2["Edge case\n(implementation varies)"]
        R3["✗ INVISIBLE"]
    end

    P --> C1 --> R1
    P --> C2 --> R2
    P --> C3 --> R3

    style R1 fill:#4CAF50,color:#fff
    style R2 fill:#ffc107,color:#333
    style R3 fill:#e74c3c,color:#fff
Figure: The Opacity Mask Clip Value determines the visibility threshold.
Two-Sided Foliage
For leaves and other thin masked surfaces, enable Two Sided so both sides render. Additionally, enable the Two Sided Foliage shading model if you want light to transmit through the surface—making leaves glow when backlit by the sun.
To use Two Sided Foliage shading:
Step 1: In Details, set Shading Model to Two Sided Foliage.
Step 2: A new input appears: Subsurface Color. This controls the color of light passing through. For leaves, use a warm yellow-green.
✅ Pro Tip: Dithered Opacity for LODs
For foliage that needs to fade out with distance (LOD transitions), consider using Dithered Opacity Mask instead of a hard cutoff. This creates a stippled fade effect that's less jarring than a sudden pop. Enable it via the Dithered LOD Transition checkbox in material settings.
Masked vs Translucent: When to Choose
Figure: Choose Masked when possible for better performance; use Translucent only when gradual transparency is essential.
Emissive Materials (Glow Effects)
Emissive materials appear to glow—they emit light rather than just reflecting it. Neon signs, computer screens, magic effects, lava, bioluminescent creatures—all use emissive materials. The beauty is that emissive surfaces look bright even in dark environments, creating striking visual effects.
📖 Definition
Emissive Color: A material input that adds light output to the surface. Unlike Base Color which responds to lighting, Emissive Color is added directly to the final pixel color regardless of scene lighting. Values above 1.0 create HDR bloom effects.
Basic Emissive Setup
Every material has an Emissive Color input on the main material node. Connect a color value here to make the surface glow. The material can still be Opaque—emissive works with any blend mode.
Step 1: Create a new material or open an existing one.
Step 2: Add a Vector Parameter for the glow color. Name it Emissive_Color. Set a vibrant color like bright cyan (0, 1, 1).
Step 3: Add a Scalar Parameter for intensity. Name it Emissive_Intensity. Set default to 5.0, with Slider Max around 50.
Step 4: Create a Multiply node. Connect the color to A and intensity to B.
Step 5: Connect the Multiply output to Emissive Color on the main material node.
Figure: Multiplying color by intensity allows easy control over glow brightness.
Understanding HDR and Bloom
Emissive values above 1.0 enter HDR (High Dynamic Range) territory. These super-bright values trigger the Bloom post-process effect, creating that characteristic glow halo around bright objects.
The relationship between intensity and visual result:
0.0 - 1.0: Normal brightness range. Visible but no bloom effect.
1.0 - 5.0: Bright with subtle bloom. Good for screens, indicator lights.
5.0 - 20.0: Strong glow with noticeable bloom halo. Neon signs, magic effects.
20.0+: Intense, almost blinding glow. Sun-like effects, explosions.
✅ Pro Tip: Check Your Post Process
Bloom must be enabled in your Post Process Volume for the glow halo effect to appear. If your emissive materials look flat, check Post Process Volume → Lens → Bloom → Intensity. A value around 0.5-1.0 gives natural-looking bloom.
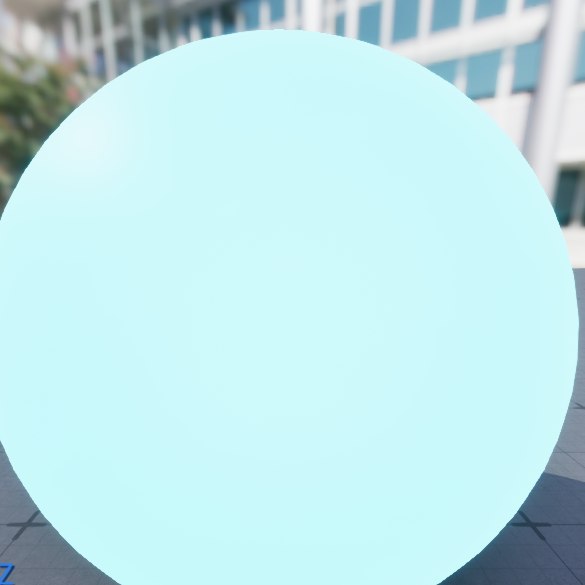
Figure: An HDR emissive material on the preview sphere · the surface emits its own cyan light and reads as self-lit rather than shaded.
Emissive Textures
Instead of a solid color, you can use textures to control which parts of a surface glow. This is perfect for:
Control panels: Buttons and screens glow while the frame stays dark
Circuit patterns: Glowing lines on a dark surface
Lava cracks: Bright emissive in the cracks, dark rock elsewhere
Create or import a texture where bright areas represent glowing regions. Multiply this texture by your emissive color and intensity, then connect to Emissive Color.
Figure: An emissive mask texture controls which parts of a surface appear to glow.
Animated Emissives
Emissive materials become even more impactful when animated. Pulsing lights, flickering screens, energy flowing through circuits—all achieved by animating the emissive intensity or color over time.
Use the Time node combined with Sine to create smooth pulsing:
Time → Multiply (speed) → Sine → Remap/Abs → Multiply with color
The Sine node outputs values from -1 to 1. Use Abs (absolute value) for 0 to 1 range, or add 1 and divide by 2 for the same effect.
💡 Emissive Doesn't Cast Light (By Default)
Emissive materials appear to glow but don't actually illuminate nearby surfaces by default. For true light emission, you need to either:
- Add a Point/Spot Light near the emissive surface
- Enable Use Emissive for Static Lighting (for baked lighting)
- Use Lumen (UE5's global illumination) which handles emissive light bounce
Emissive with Lumen
Unreal Engine 5's Lumen global illumination system can make emissive surfaces actually cast light onto nearby geometry. This creates incredibly realistic lighting from screens, signs, and glowing objects.
For Lumen to pick up emissive lighting, the emissive intensity generally needs to be quite high (50+). Adjust to taste while watching the light contribution in your scene. Lumen emissive lighting is fully dynamic—animate the emissive, and the light it casts updates in real-time.
⚠️ Watch Out: Performance with Many Emissive Lights
While Lumen handles emissive lighting beautifully, having many bright emissive surfaces all casting light can impact performance. Use emissive lighting strategically—it's most effective on larger surfaces or key focal points rather than scattered across hundreds of small objects.
Decals
Decals project materials onto other surfaces without modifying their geometry. Think of them like stickers for your 3D world—bullet holes on walls, dirt on floors, graffiti on buildings, blood splatters, footprints, and warning signs all use decals. They're incredibly versatile and performance-friendly.
📖 Definition
Decal: A material projected onto scene geometry from a box-shaped volume. The decal material modifies the appearance of surfaces it touches—adding color, normal detail, roughness changes, or combinations thereof—without altering the underlying mesh.
How Decals Work
Decals use a Decal Actor that defines a projection volume (a box). Any surface geometry inside this box receives the decal material projected onto it. The decal follows the surface's shape, wrapping around corners and conforming to uneven terrain.
flowchart LR
    subgraph DecalActor["Decal Actor"]
        Box["Projection Box\n(defines area)"]
        Mat["Decal Material\n(what to project)"]
    end

    subgraph Scene["Scene Geometry"]
        Wall["Wall"]
        Floor["Floor"]
        Prop["Prop"]
    end

    subgraph Result["Result"]
        R1["Decal appears on\nall surfaces in box"]
        R2["Conforms to\nsurface shape"]
        R3["No mesh modification"]
    end

    Box --> Wall
    Box --> Floor
    Box --> Prop
    Mat --> R1
    Wall --> R2
    Floor --> R2
    Prop --> R2
    R2 --> R3

    style DecalActor fill:#667eea,color:#fff
    style Result fill:#4CAF50,color:#fff
Figure: Decals project their material onto any geometry within their volume.
Creating a Decal Material
Step 1: Create a new Material. In the Details panel, change Material Domain from Surface to Deferred Decal.
Step 2: Set the Blend Mode appropriately:
- Translucent: For decals with soft edges or partial transparency
- Masked: For decals with hard cutout edges
Step 3: Choose what the decal affects via Decal Blend Mode:
- Translucent: Affects Base Color, Metallic, Specular, Roughness, Normal, Emissive
- Stain: Only affects Base Color (good for dirt/stains that shouldn't change roughness)
- Normal: Only affects Normal (for adding surface detail without color change)
- Emissive: Only affects Emissive (for glowing decals like neon signs)
Step 4: Connect your textures to the appropriate outputs. Most decals need at least a Base Color (or Emissive) and an Opacity Mask.
Figure: Decal materials use Deferred Decal domain with appropriate blend modes.
Placing Decals in Your Level
Method 1 - Drag and Drop: Drag your Decal Material directly from Content Browser into the viewport. Unreal creates a Decal Actor automatically.
Method 2 - Decal Actor: Place → All Classes → search "Decal". Then assign your decal material in the Details panel.
Once placed, adjust the decal's transform:
- Position: Move the decal to where you want the effect
- Rotation: Rotate to face the surface (the decal projects along its local X axis)
- Scale: Resize the projection box—larger scale means the decal covers more area
In the Decal Actor's Details panel, adjust Decal Size for more precise control over the projection volume dimensions.
Decal Sorting and Priority
When multiple decals overlap, you need to control which one appears on top. Use the Sort Order property in the Decal Actor's Details panel. Higher values render on top of lower values.
For example:
- Base dirt layer: Sort Order 0
- Graffiti on wall: Sort Order 1
- Bullet hole on graffiti: Sort Order 2
✅ Pro Tip: Decal Performance
Decals are generally cheap, but a few practices keep them optimized:
- Keep projection volumes as small as needed—large decals test against more scene geometry
- Use appropriate Decal Blend Mode—Stain is cheaper than Translucent
- Limit overlapping decals in the same area
- Use Receives Decals = false on objects that shouldn't receive them
Common Decal Uses
Environmental storytelling: Dirt buildup, water stains, rust, graffiti, posters, warning signs—all without modeling these details into every mesh.
Gameplay feedback: Bullet impacts, explosion scorch marks, blood splatters, footprints in snow. These are often spawned dynamically during gameplay.
Detail enhancement: Add normal-only decals to break up flat walls with cracks, scratches, or surface imperfections.
Signage and UI: In-world text, logos, and interface elements that need to appear on arbitrary surfaces.
Figure: Decals serve many purposes from environmental detail to dynamic gameplay effects.
Landscape Materials Introduction
Landscape materials are specialized materials designed for Unreal's Landscape system—the tool for creating large outdoor terrains. Unlike regular materials applied to static meshes, landscape materials need to handle multiple texture layers that blend based on painting, support massive scale with proper tiling, and maintain performance across potentially millions of polygons.
💡 Scope Note
Landscape creation is a deep topic covered in a later module. This section introduces landscape material concepts so you understand how they differ from standard materials. You'll build complete landscape materials when we explore the Landscape tools in detail.
What Makes Landscape Materials Different
Standard materials apply uniformly across a mesh. Landscape materials instead define multiple layers (grass, dirt, rock, snow, etc.) that artists can paint directly onto the terrain in the editor.
Key differences from regular materials:
Layer-based: Multiple complete texture sets that blend together based on painted weight maps
Tiling considerations: Must tile seamlessly across enormous distances without obvious repetition
Performance critical: Landscapes can have millions of vertices—material complexity directly impacts frame rate
Painted blending: The Landscape tool paints layer weights; the material uses these weights to blend textures
flowchart TD
    subgraph Layers["Material Defines Layers"]
        L1["Layer 1: Grass\nGreen, low roughness"]
        L2["Layer 2: Dirt\nBrown, medium roughness"]
        L3["Layer 3: Rock\nGray, high roughness"]
    end

    subgraph Painting["Artist Paints Weights"]
        P1["Weight Map\n(per-layer masks)"]
    end

    subgraph Blend["Material Blends"]
        B1["Where weight = Grass\nshow grass textures"]
        B2["Where weight = Dirt\nshow dirt textures"]
        B3["Where weight = Rock\nshow rock textures"]
    end

    subgraph Result["Final Terrain"]
        R1["Seamless blended\nterrain surface"]
    end

    Layers --> Painting
    Painting --> Blend
    Blend --> Result

    style Layers fill:#4CAF50,color:#fff
    style Painting fill:#FF9800,color:#fff
    style Blend fill:#667eea,color:#fff
    style Result fill:#2196F3,color:#fff
Figure: Landscape materials blend multiple layers based on painted weight maps.
Landscape Layer Blend Node
The core of any landscape material is the Landscape Layer Blend node. This node takes multiple inputs (one per layer) and blends them based on the painted layer weights.
Each layer you add to the node requires:
Layer Name: A unique identifier like "Grass", "Dirt", "Rock"—this is what appears in the Landscape paint tool
Blend Type: How this layer blends with others
- LB Weight Blend: Standard painting—layers blend based on painted weight
- LB Alpha Blend: This layer paints over others completely (good for roads, paths)
- LB Height Blend: Uses height information for more natural blending at edges
Preview Weight: How much of this layer shows in the material preview (doesn't affect in-game)
Figure: The Landscape Layer Blend node combines multiple texture layers based on painted weights.
Height-Based Blending
Simple weight blending creates soft, uniform transitions between layers. For more natural results, use height-based blending. This technique uses a height map for each layer to determine which surface "wins" at blend boundaries.
For example, at a grass-rock boundary, instead of a smooth gradient, the rock texture appears where its height map is highest (representing raised rock surfaces), while grass fills the lower areas (representing soil between rocks). This creates much more realistic, organic-looking transitions.
Tiling and Macro Variation
Landscapes stretch across vast distances. A texture that tiles every 2 meters will repeat thousands of times across a terrain, creating obvious patterns visible from any distance.
Combat repetition with:
Large tiling values: Stretch textures further (but they may lose detail up close)
Distance-based tiling: Use different tiling for near vs. far viewing distances
Macro variation textures: Large-scale color variation overlays that break up patterns
Detail textures: High-frequency detail added up close that disappears at distance
⚠️ Watch Out: Landscape Material Complexity
Every texture sample in a landscape material multiplies across potentially millions of vertices. Landscape materials are often the most performance-critical materials in a project. Keep layer counts reasonable (3-5 layers is common for game projects), and use texture arrays or virtual texturing for larger layer counts.
When You'll Use Landscape Materials
You'll create landscape materials when working with:
- Outdoor open-world environments
- Terrain for any ground surface (natural or urban)
- Large-scale environmental art
- Games with paintable terrain (strategy games, builders)
We'll cover landscape material creation in full detail in the Landscape module, including practical exercises building multi-layer terrain materials with proper blending, tiling, and performance optimization.
Substrate: Next-Generation Materials
🧪 Experimental in UE 5.8
Substrate is an opt-in feature. Enable it in Project Settings · Rendering · Substrate materials (Experimental), then restart the editor. It changes how every material is authored project-wide, so treat it as a deliberate project decision rather than a per-material toggle.
Everything so far in this lesson has used Unreal's classic material model: you pick one Shading Model (Default Lit, Subsurface, Clear Coat, and so on) and one Blend Mode, then wire values into a fixed set of pins (Base Color, Metallic, Roughness, Opacity). It works well, but it is rigid. A surface that is metal, under a clear coat, under a layer of dust does not fit neatly into any single shading model.
Substrate (introduced experimentally as "Strata" and later renamed) replaces that fixed system with a modular, layered one. Instead of choosing a shading model, you describe a surface by combining Substrate Slab building blocks with layering operators. One consistent framework covers what used to require many separate shading models.
📖 Definition
Substrate Slab: A single physically based building block (a BSDF) describing one layer of a surface: its diffuse albedo, specular F0, roughness, and normal, plus optional properties like subsurface scattering, anisotropy, fuzz, or a coat. Slabs are combined with operators to build the finished material.
The Substrate Root Node
When Substrate is enabled, the main material output node changes. The classic Base Color / Metallic / Specular / Roughness pins are replaced by a single Front Material input that accepts a Substrate topology (one slab, or a stack of slabs joined by operators), alongside familiar inputs like Opacity, Emissive Color, and World Position Offset.
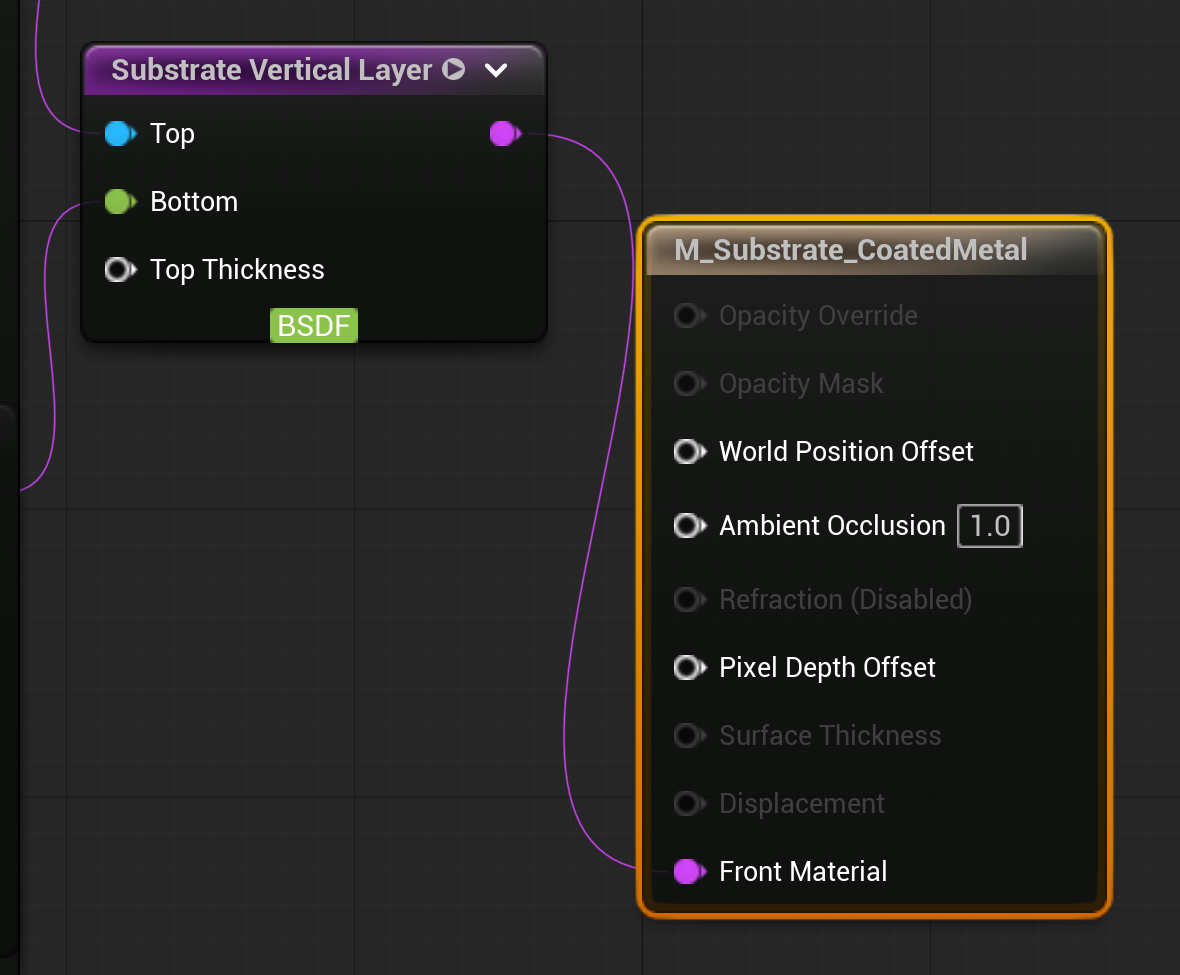
Figure: A real Substrate material · a Vertical Layering operator (fed by two Slab BSDFs) drives the material's single Front Material input.
Layering Operators
Slabs are assembled with a small set of operators:
- Substrate Horizontal Layering: blends two slabs side by side across the surface, like mixing two materials through a mask.
- Substrate Vertical Layering: stacks one slab on top of another (a clear coat over a base, for example), with the top layer partially covering the one beneath.
- Substrate Add / Weight: combine or scale slab contributions.
- Substrate Coverage: controls how much of the surface a layer occupies.
With these, a car-paint material (a metallic flake base, a tinted layer, and a clear coat) becomes a single readable graph instead of a shading-model compromise.
Figure: Substrate swaps the fixed shading-model pins for layered Slab BSDFs joined by operators.
Why It Matters
Substrate unifies the material model: one framework for opaque, translucent, coated, and scattering surfaces, with more physically consistent results and genuine multi-layer authoring. It is the foundation Epic is building future material work on, so it is worth understanding now, even while it is Experimental.
⚠️ Watch Out: Experimental Trade-offs
Because Substrate is Experimental in UE 5.8, expect rough edges. Enabling it is a project-wide switch that requires a restart, existing materials are converted automatically but may need review, and not every engine feature or platform supports it equally yet. Use it to learn and prototype, but keep the classic model for anything shipping today unless you have tested Substrate thoroughly on your target hardware.
💡 Pro-Tip
You do not have to convert existing materials to explore Substrate. Enable it in a scratch project or a copy, build one Slab material, then add a Vertical Layering operator for a coat. Seeing the Front Material input and a Slab node in the graph is the fastest way to understand the model.
Stylized & Toon Materials (NPR)
Not every project aims for photorealism. Cel-shaded, comic-book, and painterly looks fall under non-photorealistic rendering (NPR). UE 5.8 gives you two routes to a stylized look: the new Substrate Toon BSDF shades the surface itself with hard cel bands (Experimental, and it requires Substrate), while a Post-Process Material restyles the whole rendered image and works in any project. Many toon looks combine both.
The Substrate Toon BSDF (Experimental in UE 5.8)
When Substrate is enabled, a dedicated Substrate Toon BSDF node becomes available. Plug it into the material's Front Material input and its lighting response is quantized into flat cel bands with a hard terminator, instead of the smooth diffuse falloff of an ordinary surface. Feed it a Base Color (and optionally a Toon Profile asset that controls how many bands there are and where they fall), and the surface reads as cel-shaded directly, with no post-process pass required.
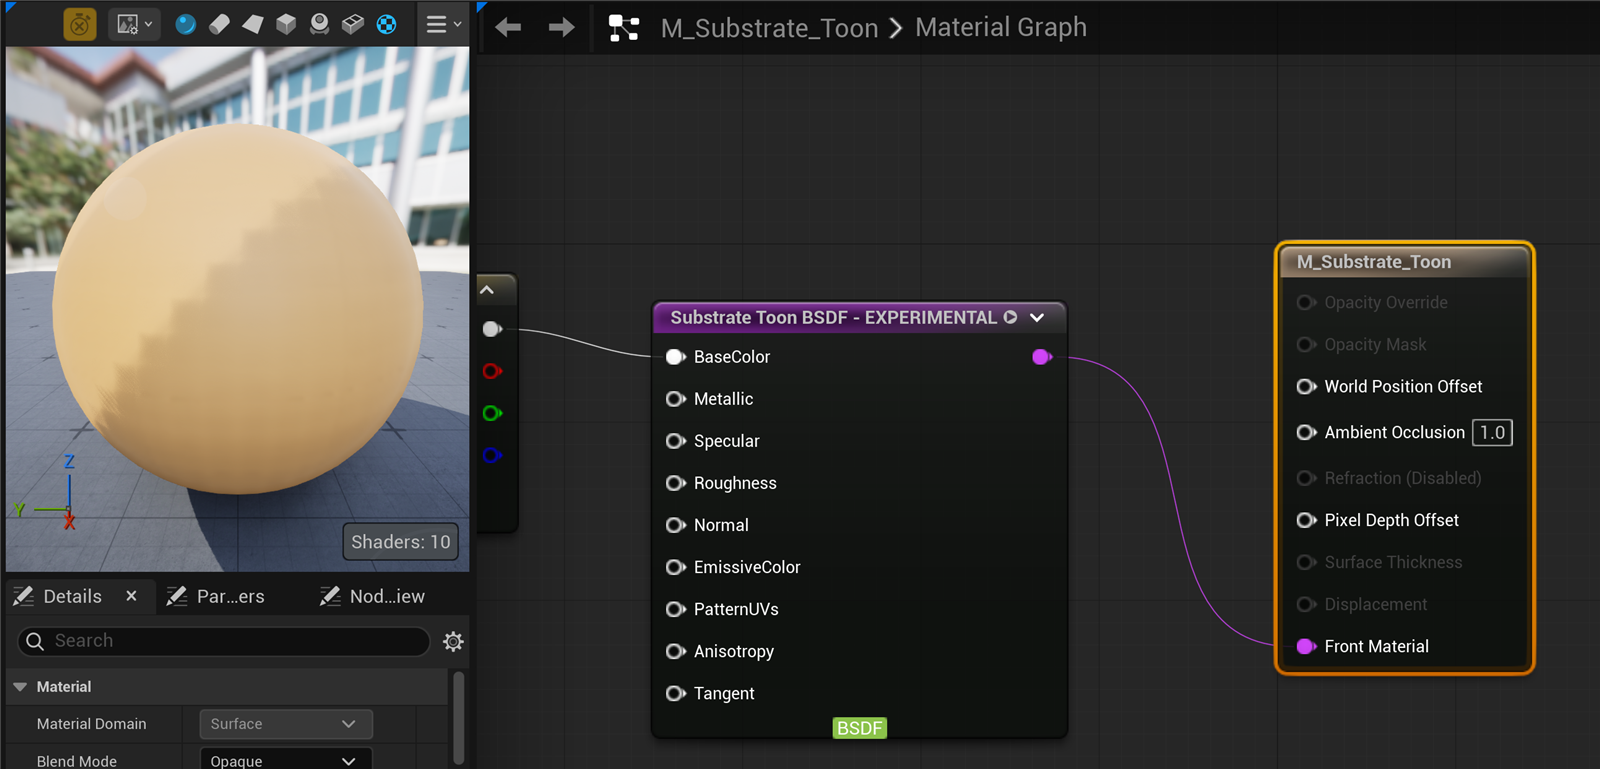
Figure: The Substrate Toon BSDF (Experimental in UE 5.8) · a dedicated cel-shading node wired into Front Material gives the preview sphere hard-stepped toon shading.
Because it shades per surface, the Toon BSDF is well suited to characters and props you want stylized while the rest of the scene stays realistic. It is Experimental in UE 5.8 and, like every Substrate feature, is a project-wide opt-in.
The Post-Process Route
The post-process approach is older and universal: it needs no Substrate and restyles everything the camera sees at once. It is the classic way to add outlines and flat banding across a whole scene, and it is what most existing Unreal toon setups use.
📖 Definition
Post-Process Material: A material with Material Domain set to Post Process. Instead of shading one surface, it runs as a full-screen pass over the rendered image, reading buffers like SceneColor, SceneDepth, and world normals, and can rewrite the final pixels. You apply it through a Post Process Volume or a camera's post-process settings.
The Two Ingredients of a Toon Look
Most toon styles combine two post-process effects:
1. Banding (posterization). Smooth lighting gradients are quantized into a few flat steps. Reading the scene color and snapping it to, say, three or four brightness levels produces the characteristic flat, cel-shaded look, with hard transitions instead of soft falloff.
2. Outlines (edge detection). A Sobel-style filter compares neighboring pixels in the SceneDepth and world-normal buffers. Where they differ sharply (a silhouette or a crease) the filter draws a dark line, giving the inked outline that reads as "drawn."
Figure: A toon look is the rendered image posterized into flat bands, plus edge-detected outlines.
Building It
The typical setup:
- Create a material and set Material Domain = Post Process.
- For banding: sample SceneTexture: PostProcessInput0 (the current color), then quantize it (for example, multiply by the step count, Floor, and divide back).
- For outlines: sample SceneTexture: SceneDepth and WorldNormal at neighboring UV offsets, difference them, and Lerp toward black where the edge is strong.
- Add the material to a Post Process Volume under Post Process Materials, or to a camera. Set the volume to Unbound to affect the whole level.
Other Stylization Tools
- Unlit materials (Shading Model = Unlit) ignore scene lighting entirely, giving flat, illustrative surfaces you light by hand through Emissive Color.
- Custom Depth / Custom Stencil let you outline only selected meshes (an interactable, an enemy) rather than the whole scene.
- Ramp textures remap lighting or Fresnel through a gradient for hand-tuned shading bands.
💡 Pro-Tip
Build the outline pass and the banding pass as two separate post-process materials while you tune them, then combine once each looks right. It is far easier to debug a wrong-looking edge when it is not tangled up with the color-banding math.
⚠️ Watch Out: Post-Process Cost and Buffers
Edge detection samples the scene several times per pixel, so a heavy outline pass is not free, especially at high resolution. Effects that read world normals or custom depth also need those buffers enabled in your project's rendering settings, or the material will read blank.
Hands-On: Create a Glowing Emissive Material
Time to put your new skills into practice! In this exercise, you'll create a sci-fi control panel material with glowing elements that pulse over time. This combines emissive techniques with material parameters for maximum flexibility.
🏋️ Exercise: Pulsing Sci-Fi Panel
Goal: Create an emissive material with animated glow that can be customized through Material Instances.
Time: 20-25 minutes
What you'll practice:
- Setting up emissive color and intensity
- Creating animated effects with Time and Sine nodes
- Using parameters for artist-friendly customization
- Building Material Instances with different glow colors
Part 1: Create the Base Material
Step 1: In Content Browser, create a new Material. Name it M_SciFi_Panel_Emissive.
Step 2: Double-click to open the Material Editor. This material will be Opaque (the default)—emissive works with any blend mode.
Step 3: Set up the base surface properties:
Create a Vector Parameter named Base_Color. Set Group to 01 - Surface. Default: dark gray (0.1, 0.1, 0.12). Connect to Base Color.
Create a Scalar Parameter named Roughness. Set Group to 01 - Surface. Default: 0.4, Slider Min: 0, Max: 1. Connect to Roughness.
Create a Scalar Parameter named Metallic. Set Group to 01 - Surface. Default: 0.8. Connect to Metallic.
💡 Hint: Why Dark Base Color?
We use a dark base color so the emissive glow stands out dramatically. Bright base colors would compete with the glow effect. The metallic surface will catch environmental reflections, adding visual interest to the non-glowing areas.
Part 2: Add the Emissive Glow
Step 4: Create the emissive color parameter:
Add a Vector Parameter named Glow_Color. Set Group to 02 - Emissive. Default: bright cyan (0, 1, 1).
Step 5: Create the intensity control:
Add a Scalar Parameter named Glow_Intensity. Set Group to 02 - Emissive. Default: 10.0, Slider Min: 0, Slider Max: 50.
Step 6: Create a Multiply node. Connect Glow_Color to A and Glow_Intensity to B.
Step 7: Connect the Multiply output to Emissive Color on the main material node.
Step 8: Click Apply. You should see a solid glowing material in the preview sphere.
Figure: At this point, the material glows but doesn't animate.
Part 3: Add the Pulsing Animation
Step 9: Create the animation speed control:
Add a Scalar Parameter named Pulse_Speed. Set Group to 03 - Animation. Default: 2.0, Slider Min: 0.1, Slider Max: 10.
Step 10: Create the animation range control:
Add a Scalar Parameter named Pulse_Min. Set Group to 03 - Animation. Default: 0.3, Slider Min: 0, Max: 1. (This is how dim the glow gets at minimum.)
Step 11: Build the animation node chain:
Add a Time node (search "Time"). This outputs ever-increasing time in seconds.
Add a Multiply node. Connect Time to A and Pulse_Speed to B. This controls animation speed.
Add a Sine node. Connect the Multiply output to it. Sine converts linear time into smooth oscillation (-1 to 1).
Add an Abs node (absolute value). Connect the Sine output to it. This converts the range from (-1 to 1) to (0 to 1)—always positive.
Step 12: Remap the range to respect Pulse_Min:
Add a Lerp (Linear Interpolate) node. Connect Pulse_Min to A, connect a Constant of 1.0 to B, and connect the Abs output to Alpha.
This makes the pulse range from Pulse_Min (at minimum) to 1.0 (at maximum).
Step 13: Multiply this animation value into your emissive chain:
Add another Multiply node between your existing Glow_Color × Glow_Intensity multiply and the Emissive Color input. Connect the Lerp output to this new Multiply.
Your chain should now be: (Glow_Color × Glow_Intensity) × (Animated Pulse) → Emissive Color
Step 14: Click Apply. The preview should now show a pulsing glow!
Figure: The complete node setup with animation controls feeding into the emissive output.
Part 4: Create Material Instances
Step 15: Right-click M_SciFi_Panel_Emissive → Create Material Instance. Name it MI_Panel_Cyan_Fast.
Keep the defaults (cyan glow) but increase Pulse_Speed to 4.0 for a faster heartbeat effect.
Step 16: Create another instance: MI_Panel_Red_Alert. Configure:
- Glow_Color: Red (1, 0, 0)
- Glow_Intensity: 20 (brighter for alert)
- Pulse_Speed: 6.0 (urgent pulsing)
- Pulse_Min: 0.5 (doesn't get as dim)
Step 17: Create a third: MI_Panel_Green_Steady. Configure:
- Glow_Color: Green (0, 1, 0.3)
- Glow_Intensity: 8
- Pulse_Speed: 0.5 (very slow, calm)
- Pulse_Min: 0.8 (barely dims—almost steady)
Step 18: Place cubes or planes in your level and apply each instance. You now have three distinct panel styles from one parent material!
✅ Solution Check: What You Should See
Your three panels should display distinctly different behaviors:
- Cyan Fast: Quick cyan pulsing, like a computer processing indicator
- Red Alert: Bright red urgent flashing, clearly an alarm state
- Green Steady: Calm green glow that barely changes, indicating normal/ready status
All three use identical shader code—only parameter values differ. This is the power of parameterized materials!
🔧 Troubleshooting: Common Issues
No glow visible:
- Check that Glow_Intensity is above 0 (try 10-20)
- Ensure all multiply nodes are connected correctly
- Verify Emissive Color input is connected on the main node
No bloom halo:
- Ensure a Post Process Volume exists with Bloom enabled
- Check Bloom Intensity in the Post Process settings (try 0.5-1.0)
- Increase Glow_Intensity—values need to exceed 1.0 for bloom
No animation:
- Verify the Time node is connected through to the final Multiply
- Check that Pulse_Speed is above 0
- Make sure the preview is set to animate (realtime preview enabled)
Animation too subtle:
- Decrease Pulse_Min toward 0 for more dramatic dimming
- Increase Pulse_Speed for more noticeable motion
Bonus Challenge: Add an Emissive Mask
Want to take this further? Create or import a texture that defines which parts of a surface should glow (white areas glow, black areas don't). Multiply this mask into your emissive chain before the Emissive Color input. Now you can create control panels where only specific buttons and screens glow while the frame stays dark!
Summary
You've now mastered the special material types that bring variety and visual interest to your Unreal Engine projects. Let's recap the key concepts:
🎯 Key Takeaways
Blend Modes determine how materials interact with what's behind them. Use Opaque for solids, Masked for cutouts, and Translucent for variable transparency. Performance decreases as you move from Opaque to Translucent.
Translucent materials enable glass, water, and see-through effects. Use Fresnel for realistic edge reflections, Surface ForwardShading for high-quality lighting, and be mindful of sorting issues with overlapping transparent objects.
Masked materials create complex shapes from simple geometry using alpha masks. They're more performant than translucent and don't have sorting problems. Perfect for foliage, fences, and hair.
Emissive materials make surfaces appear to glow. Values above 1.0 trigger HDR bloom effects. Combine with Time and Sine nodes for animated pulses. With Lumen, emissive surfaces can actually cast light.
Decals project materials onto scene geometry without modifying meshes. They're ideal for environmental detail, gameplay feedback, and signage. Use appropriate Decal Blend Modes for different effects.
Landscape materials use layer-based blending for terrain texturing. The Landscape Layer Blend node combines multiple texture sets based on painted weights. Performance is critical due to landscape scale.
Substrate (Experimental in UE 5.8) is Unreal's next-generation material model: you build surfaces from layered Slab BSDFs joined by operators instead of picking one fixed shading model. Stylized and toon looks are a post-process technique (color banding plus edge-detection outlines), not a built-in shading model.
Choosing the Right Material Type
flowchart TD
    Start["What effect do you need?"] --> Q1{"See through\nthe surface?"}

    Q1 -->|No| Opaque["Use OPAQUE\n(best performance)"]
    Q1 -->|Yes| Q2{"Gradual or\nbinary transparency?"}

    Q2 -->|"Binary (on/off)"| Masked["Use MASKED\n(cutouts, foliage)"]
    Q2 -->|"Gradual (0-100%)"| Translucent["Use TRANSLUCENT\n(glass, water, smoke)"]

    Start --> Q3{"Need surface\nto glow?"}
    Q3 -->|Yes| Emissive["Add EMISSIVE COLOR\n(works with any blend mode)"]

    Start --> Q4{"Project onto\nother surfaces?"}
    Q4 -->|Yes| Decal["Use DECAL MATERIAL\n(Deferred Decal domain)"]

    Start --> Q5{"Terrain with\npainted layers?"}
    Q5 -->|Yes| Landscape["Use LANDSCAPE MATERIAL\n(Layer Blend nodes)"]

    style Opaque fill:#4CAF50,color:#fff
    style Masked fill:#8BC34A,color:#fff
    style Translucent fill:#FF9800,color:#fff
    style Emissive fill:#00BCD4,color:#fff
    style Decal fill:#9C27B0,color:#fff
    style Landscape fill:#795548,color:#fff
Figure: Decision tree for selecting the appropriate material type.
Performance Guidelines
Keep these performance principles in mind:
Prefer Opaque: Always start with Opaque. Only switch to Masked or Translucent when the effect truly requires it.
Masked over Translucent: If you don't need gradual transparency, Masked performs better and avoids sorting issues.
Limit translucent layers: Multiple overlapping translucent surfaces compound performance cost and can cause visual artifacts.
Emissive is cheap: Adding emissive to an existing material has minimal cost. The bloom post-process has its own cost but affects all emissives equally.
Decal efficiency: Keep projection volumes small. Use simpler Decal Blend Modes (Stain, Normal) when full Translucent isn't needed.
Landscape complexity: Limit layer counts. Each layer adds texture samples across millions of vertices.
What's Next?
Congratulations on completing the Materials and Textures module! You now have comprehensive knowledge of Unreal Engine's material system—from basic PBR principles through complex parameter systems to specialized material types.
In the next module, we'll explore Lighting—how to illuminate your scenes with different light types, build static and dynamic lighting setups, and create atmosphere with fog and post-processing effects. Your material knowledge will be essential as we learn how surfaces and lights interact to create compelling visuals.